Making a sale (point of sale)
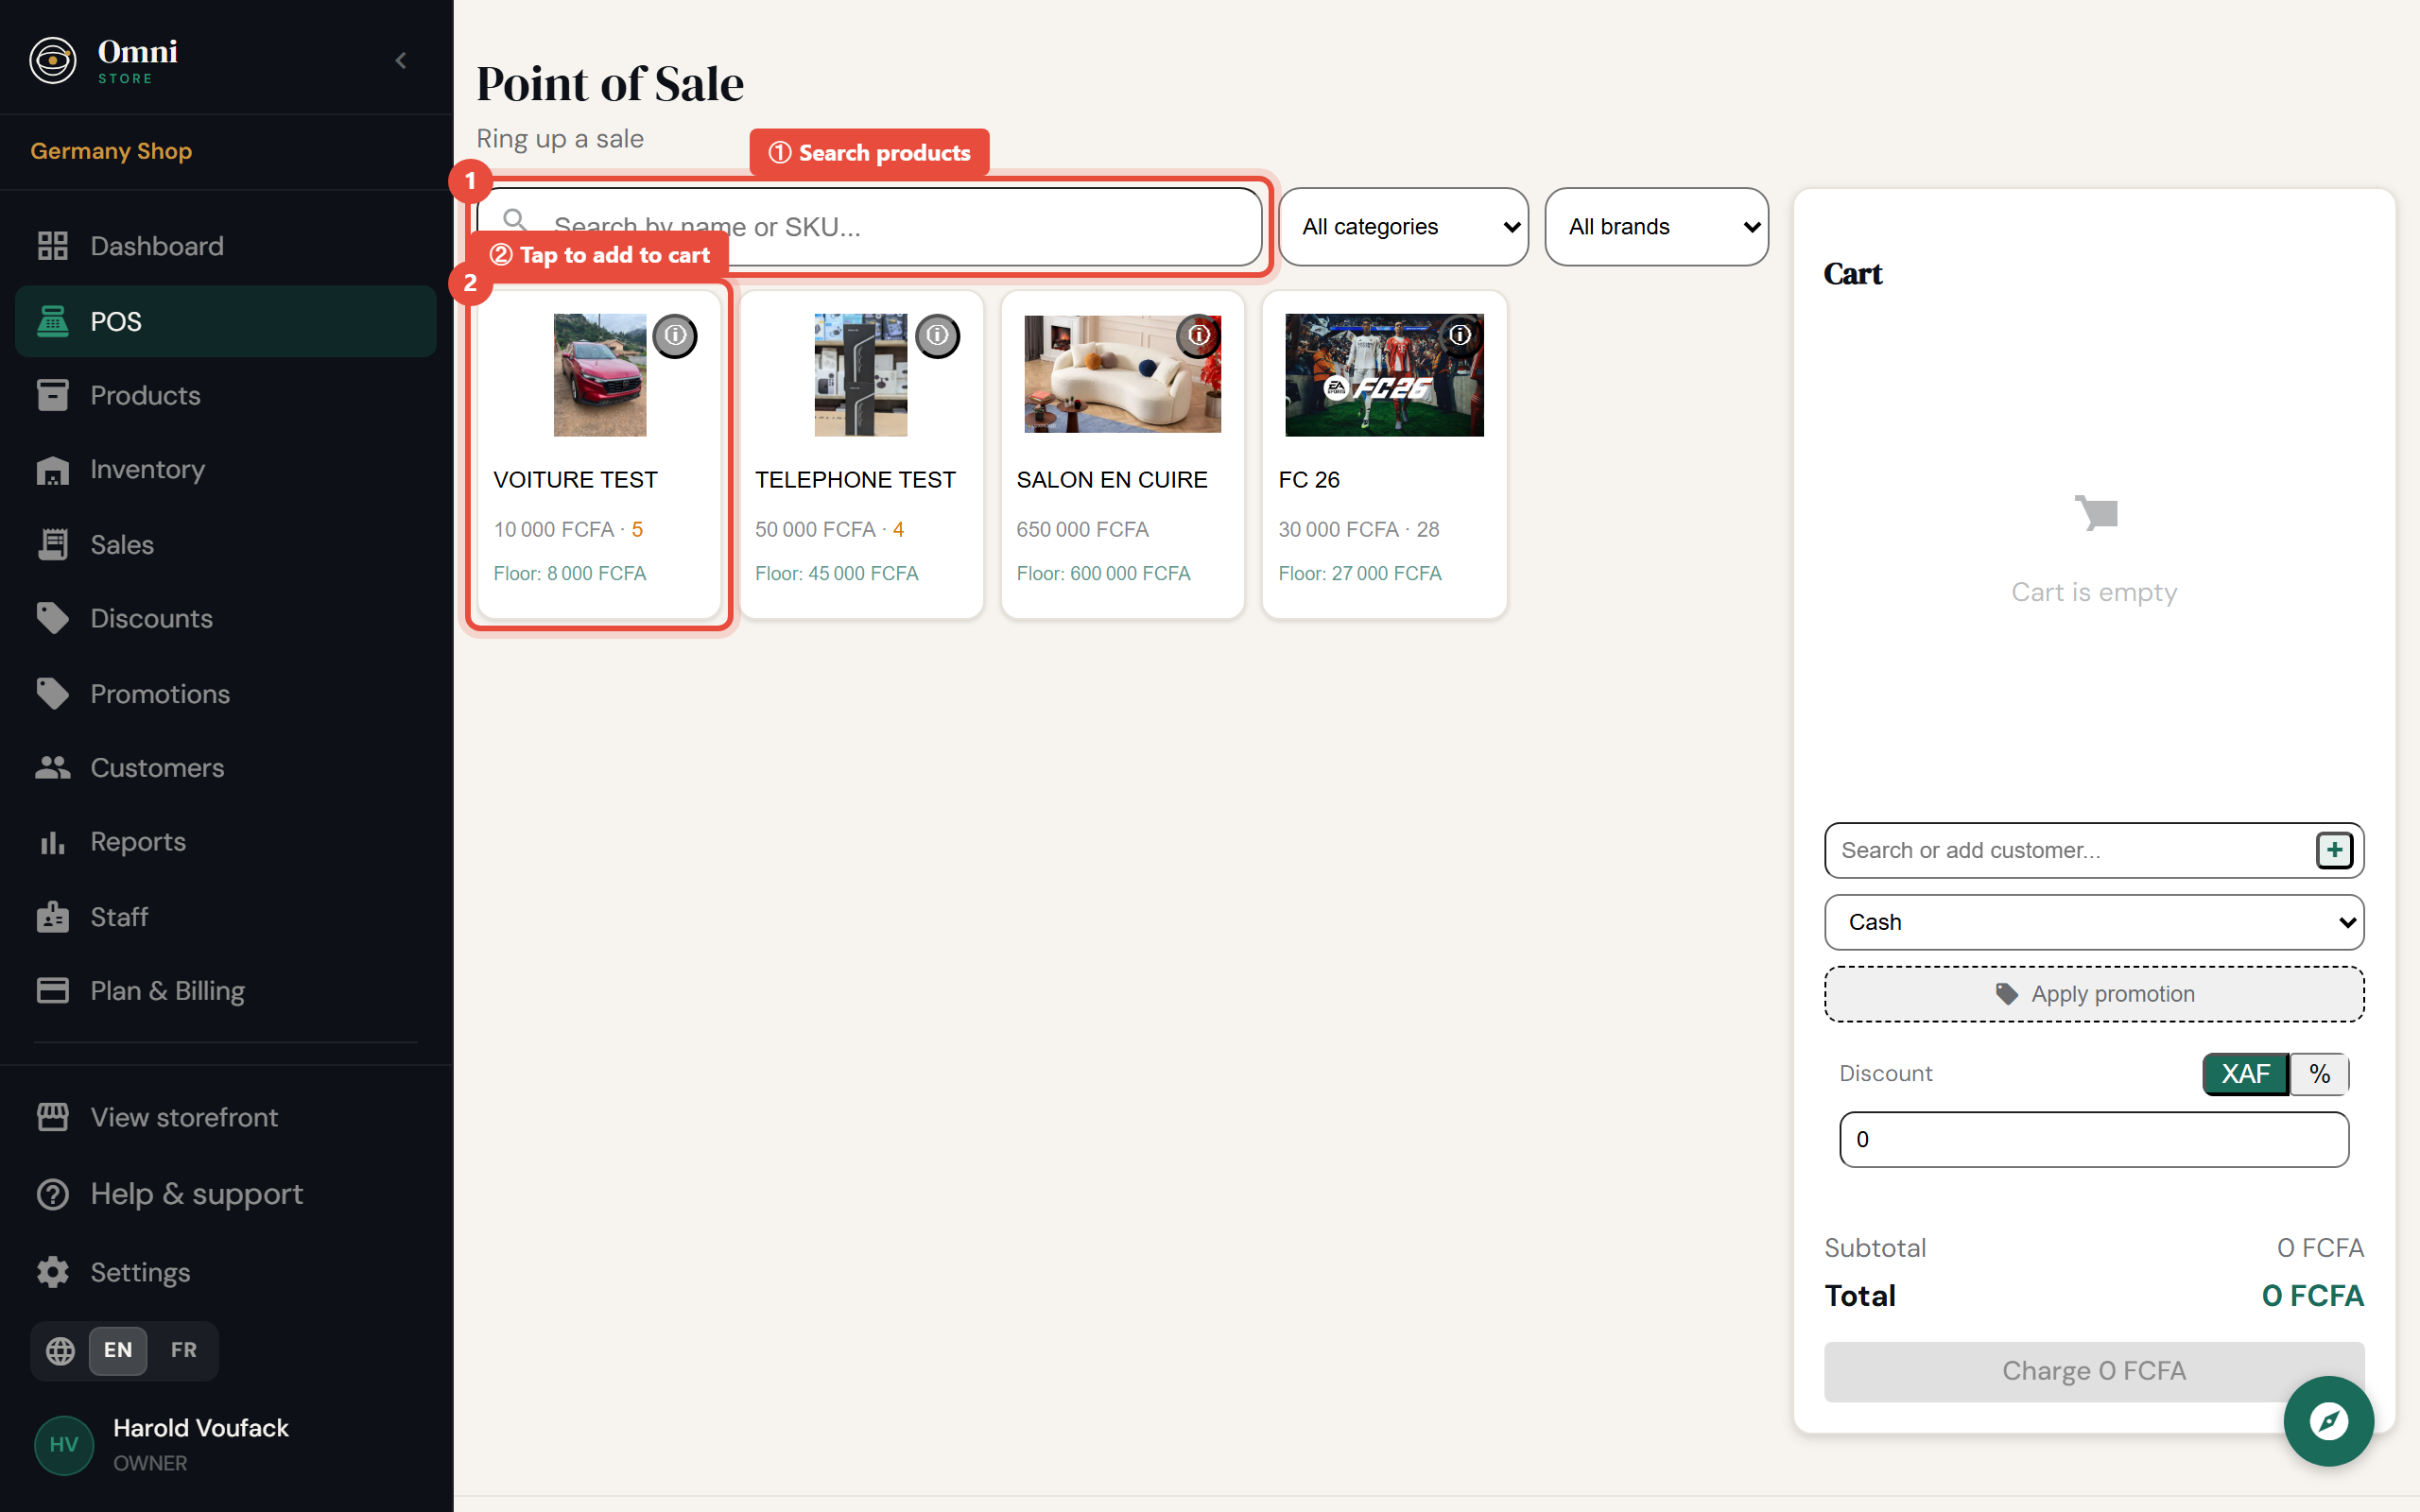
The point of sale (POS) is where you ring up sales. You'll find it under POS.
Owners, Admins, Managers & Sellers can make sales.
Ring up a sale
- Open POS.
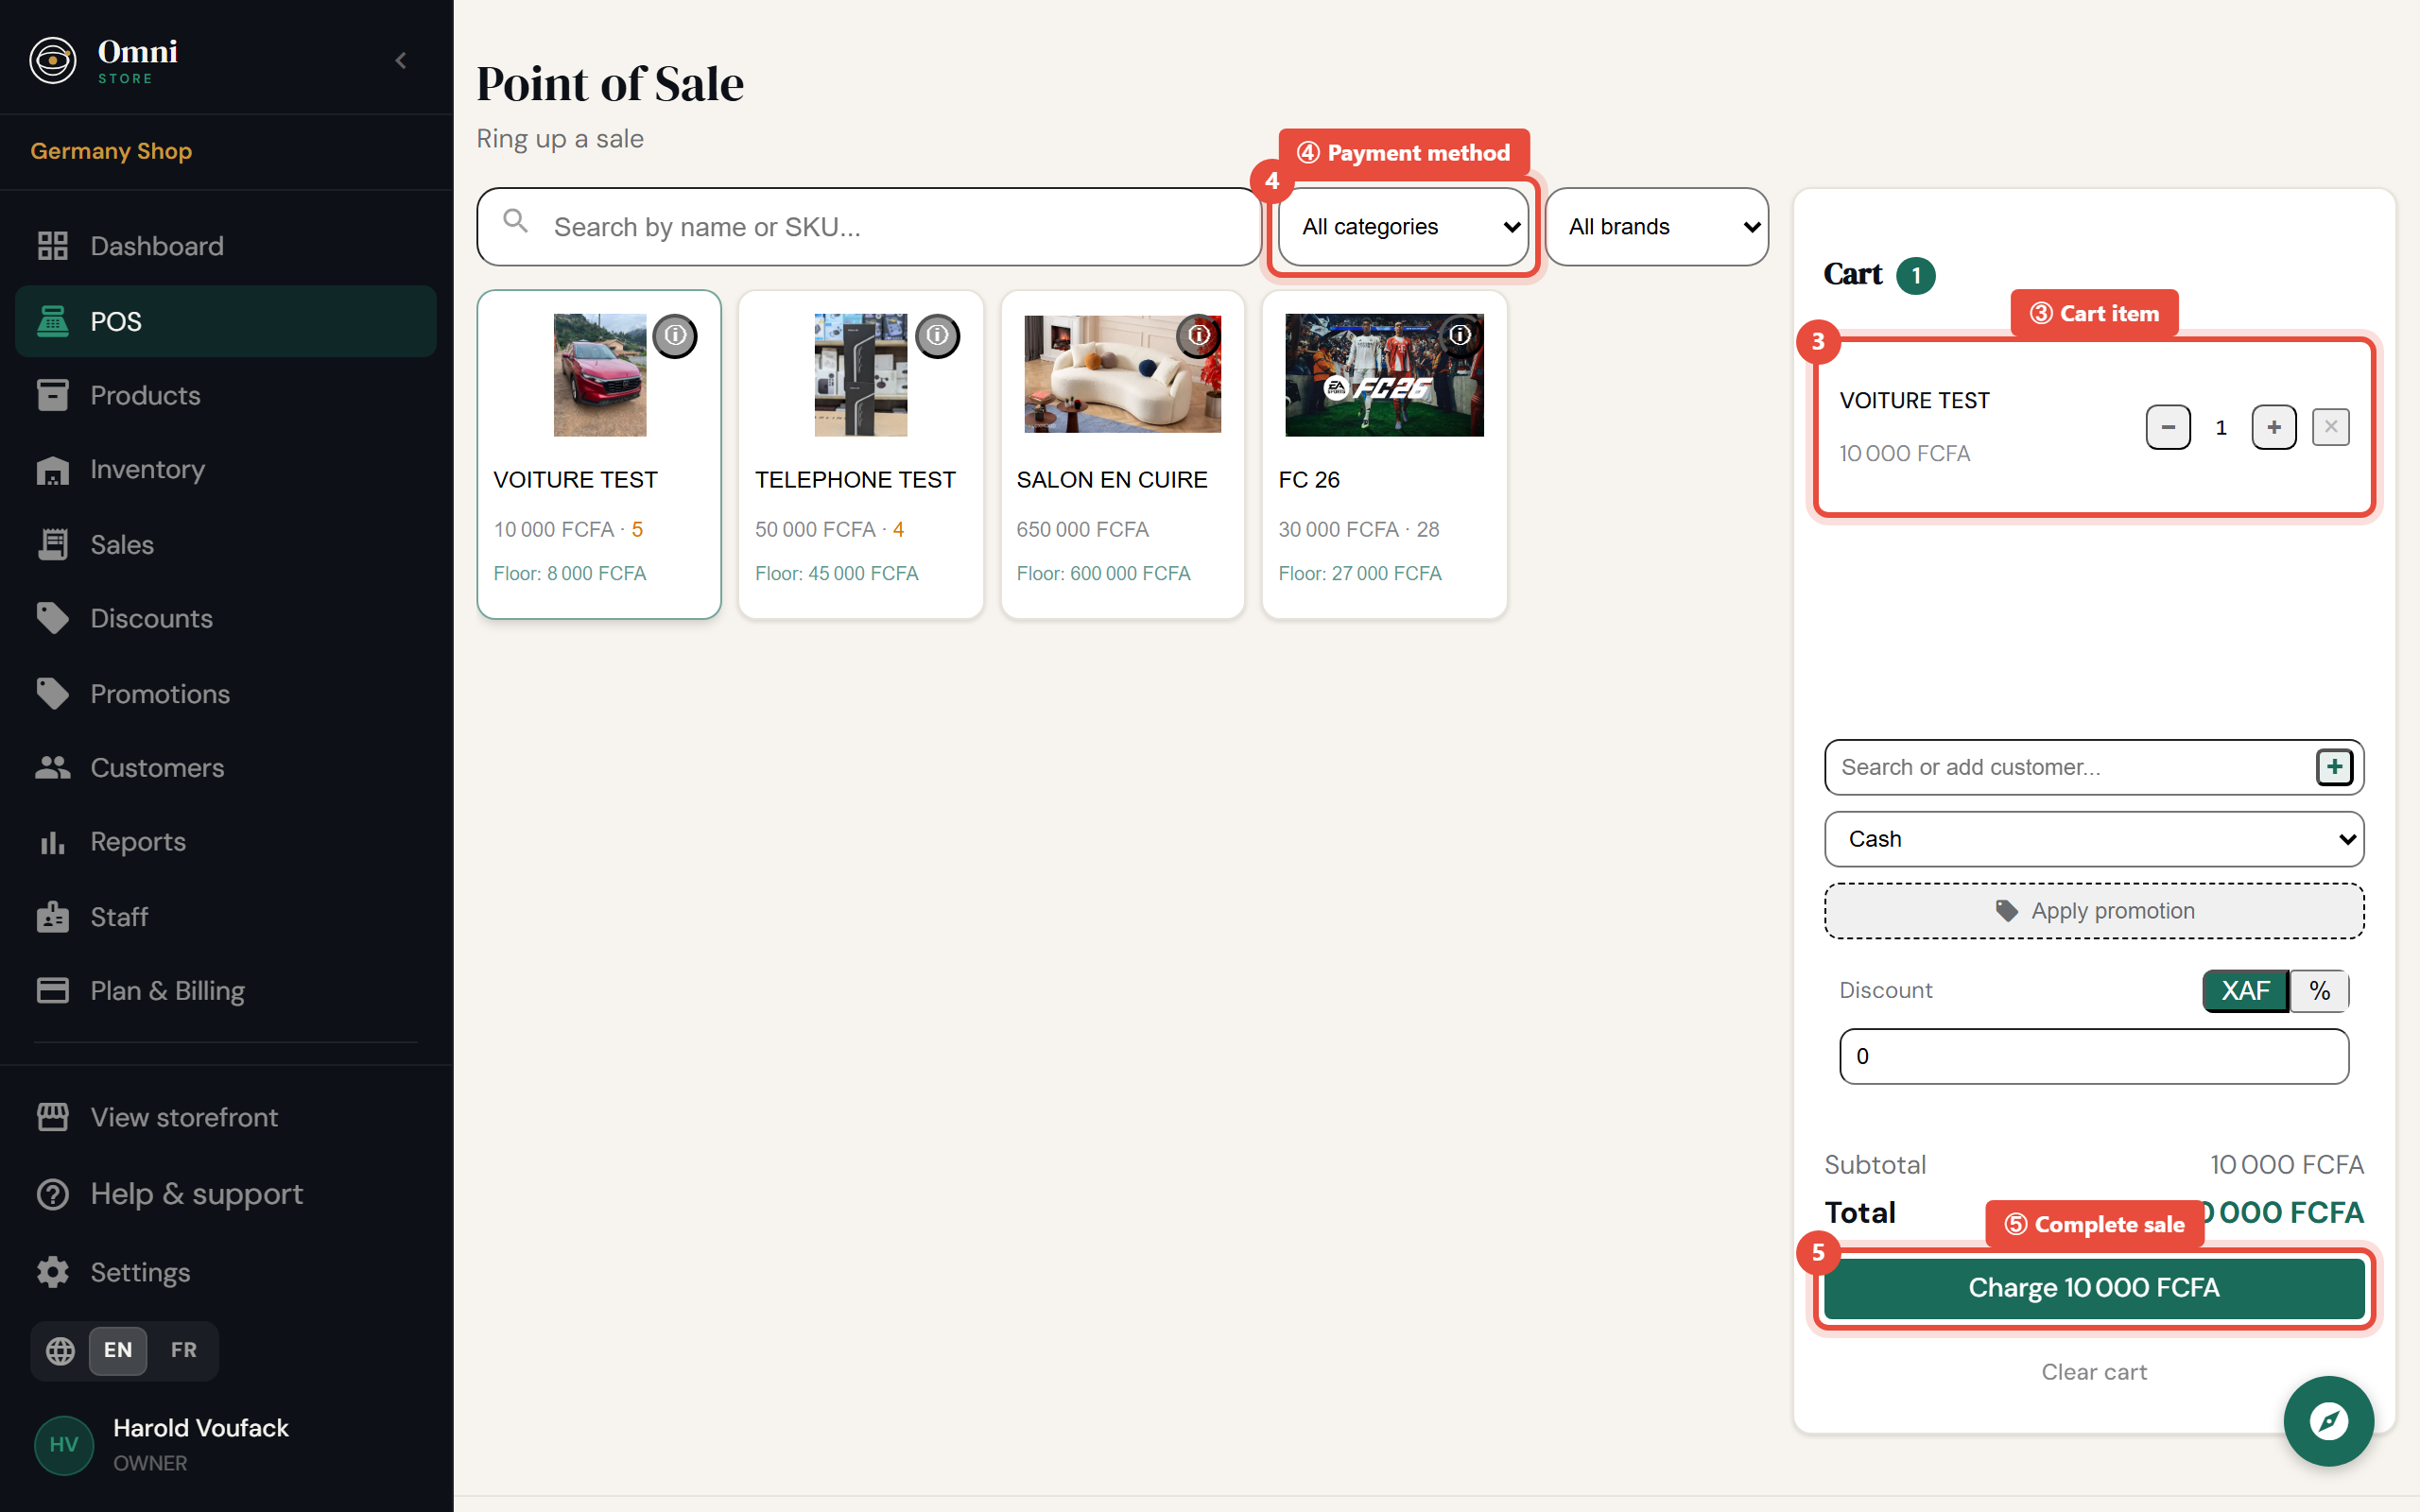
- Add items to the sale - search by name, scan a barcode, or tap a product. Repeat for everything the customer is buying, adjusting quantities as needed.
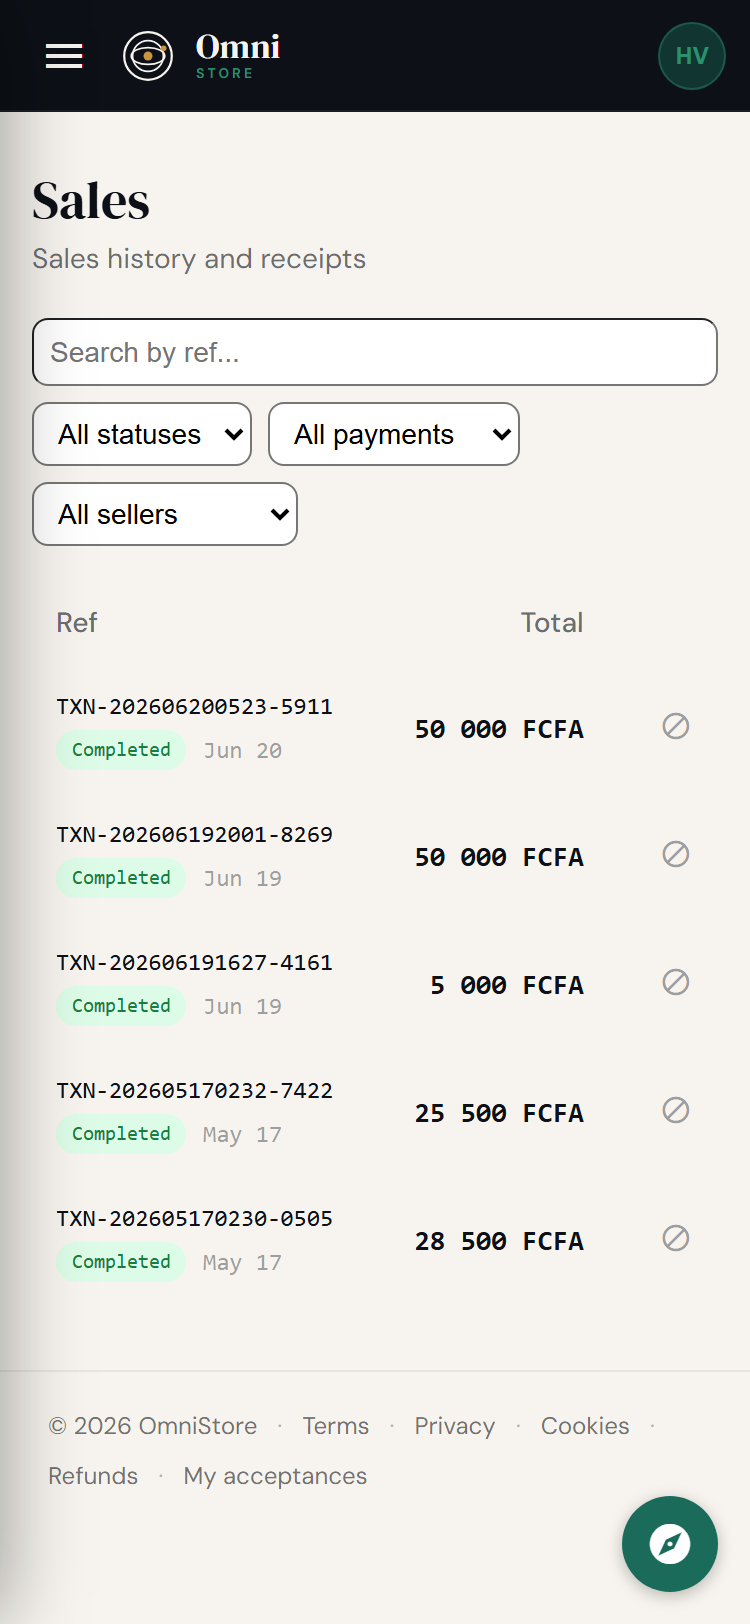
Mobile view
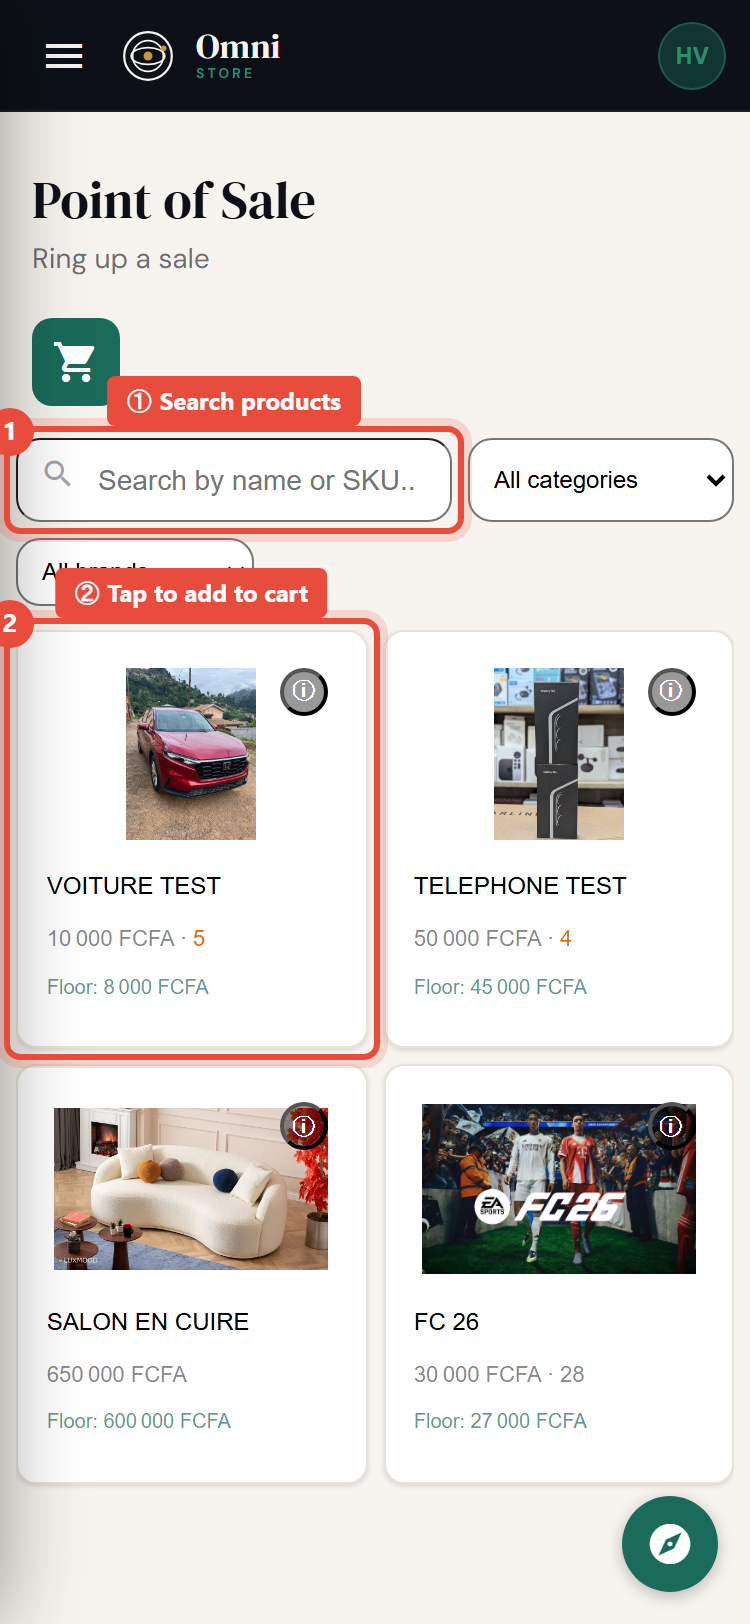
- (Optional) Apply a discount or promotion - see below.
- (Optional) Attach a customer - see below.
- Choose the payment method.
- Select Complete sale.
Mobile view
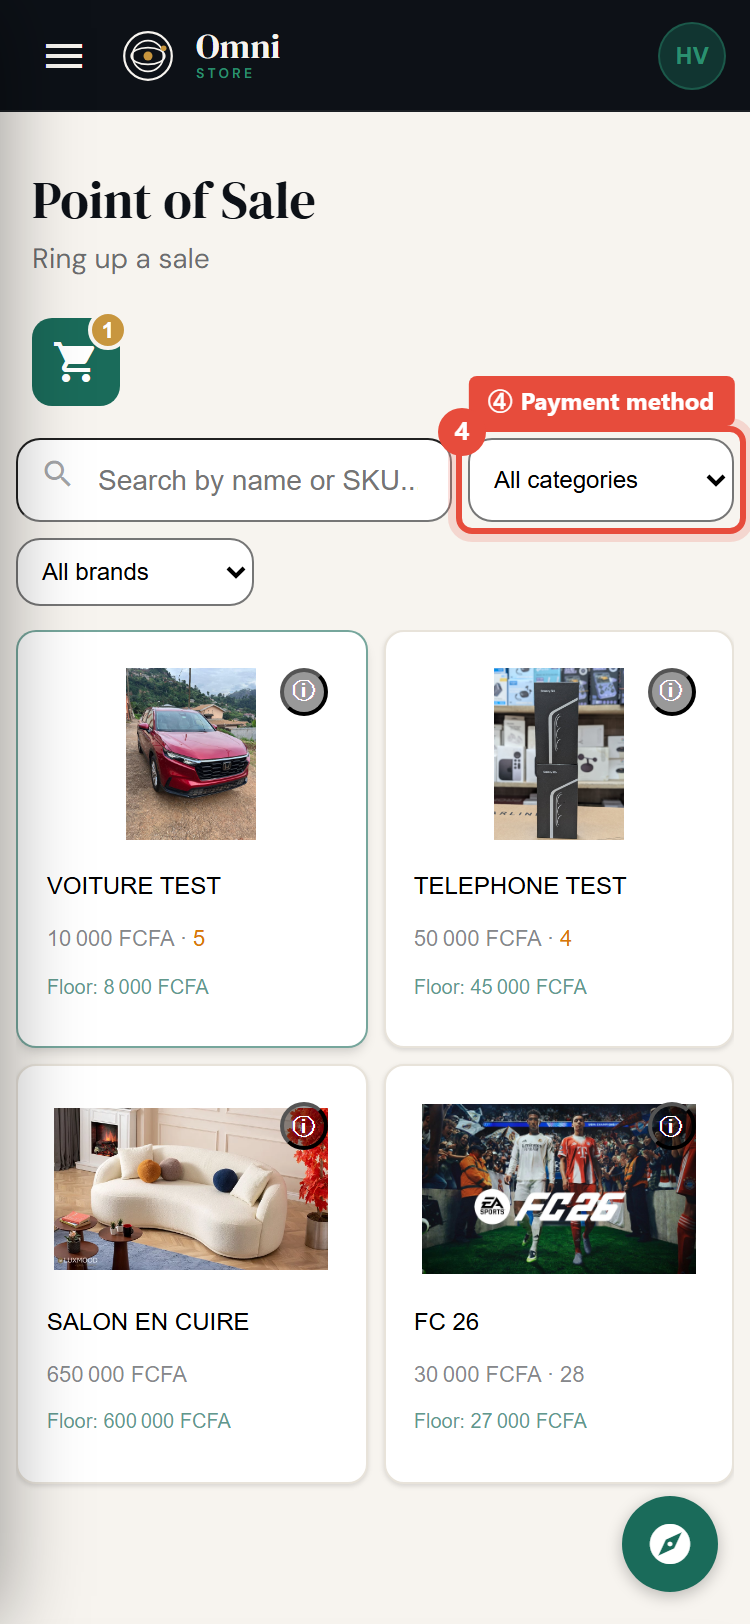
That's it. Stock is reduced, the sale is saved to your Sales history, and a receipt is ready to print or email.
Payment methods
Choose how the customer is paying:
- Cash
- Mobile money - Orange Money, MTN MoMo, or any mobile money provider your customers use.
- Card
- Credit - record the sale now, to be paid later.
- Other - anything that doesn't fit the above.
Apply a discount or promotion
There are two ways to reduce the price at checkout:
- Enter a promotion code - if you're running a promotion with a code, type it in and it's applied automatically.
- Add a manual discount - apply a one‑off discount and add a short reason (kept on the record for accountability).
Promotions can be a percentage or a fixed amount, and can apply to the whole order or just certain products, categories, or tags. See Promotions for how they're set up.
Attach a customer
Linking a sale to a customer builds their purchase history, which helps with service and marketing. Search for an existing customer or add a new one during the sale. You can also add a short note to the sale.
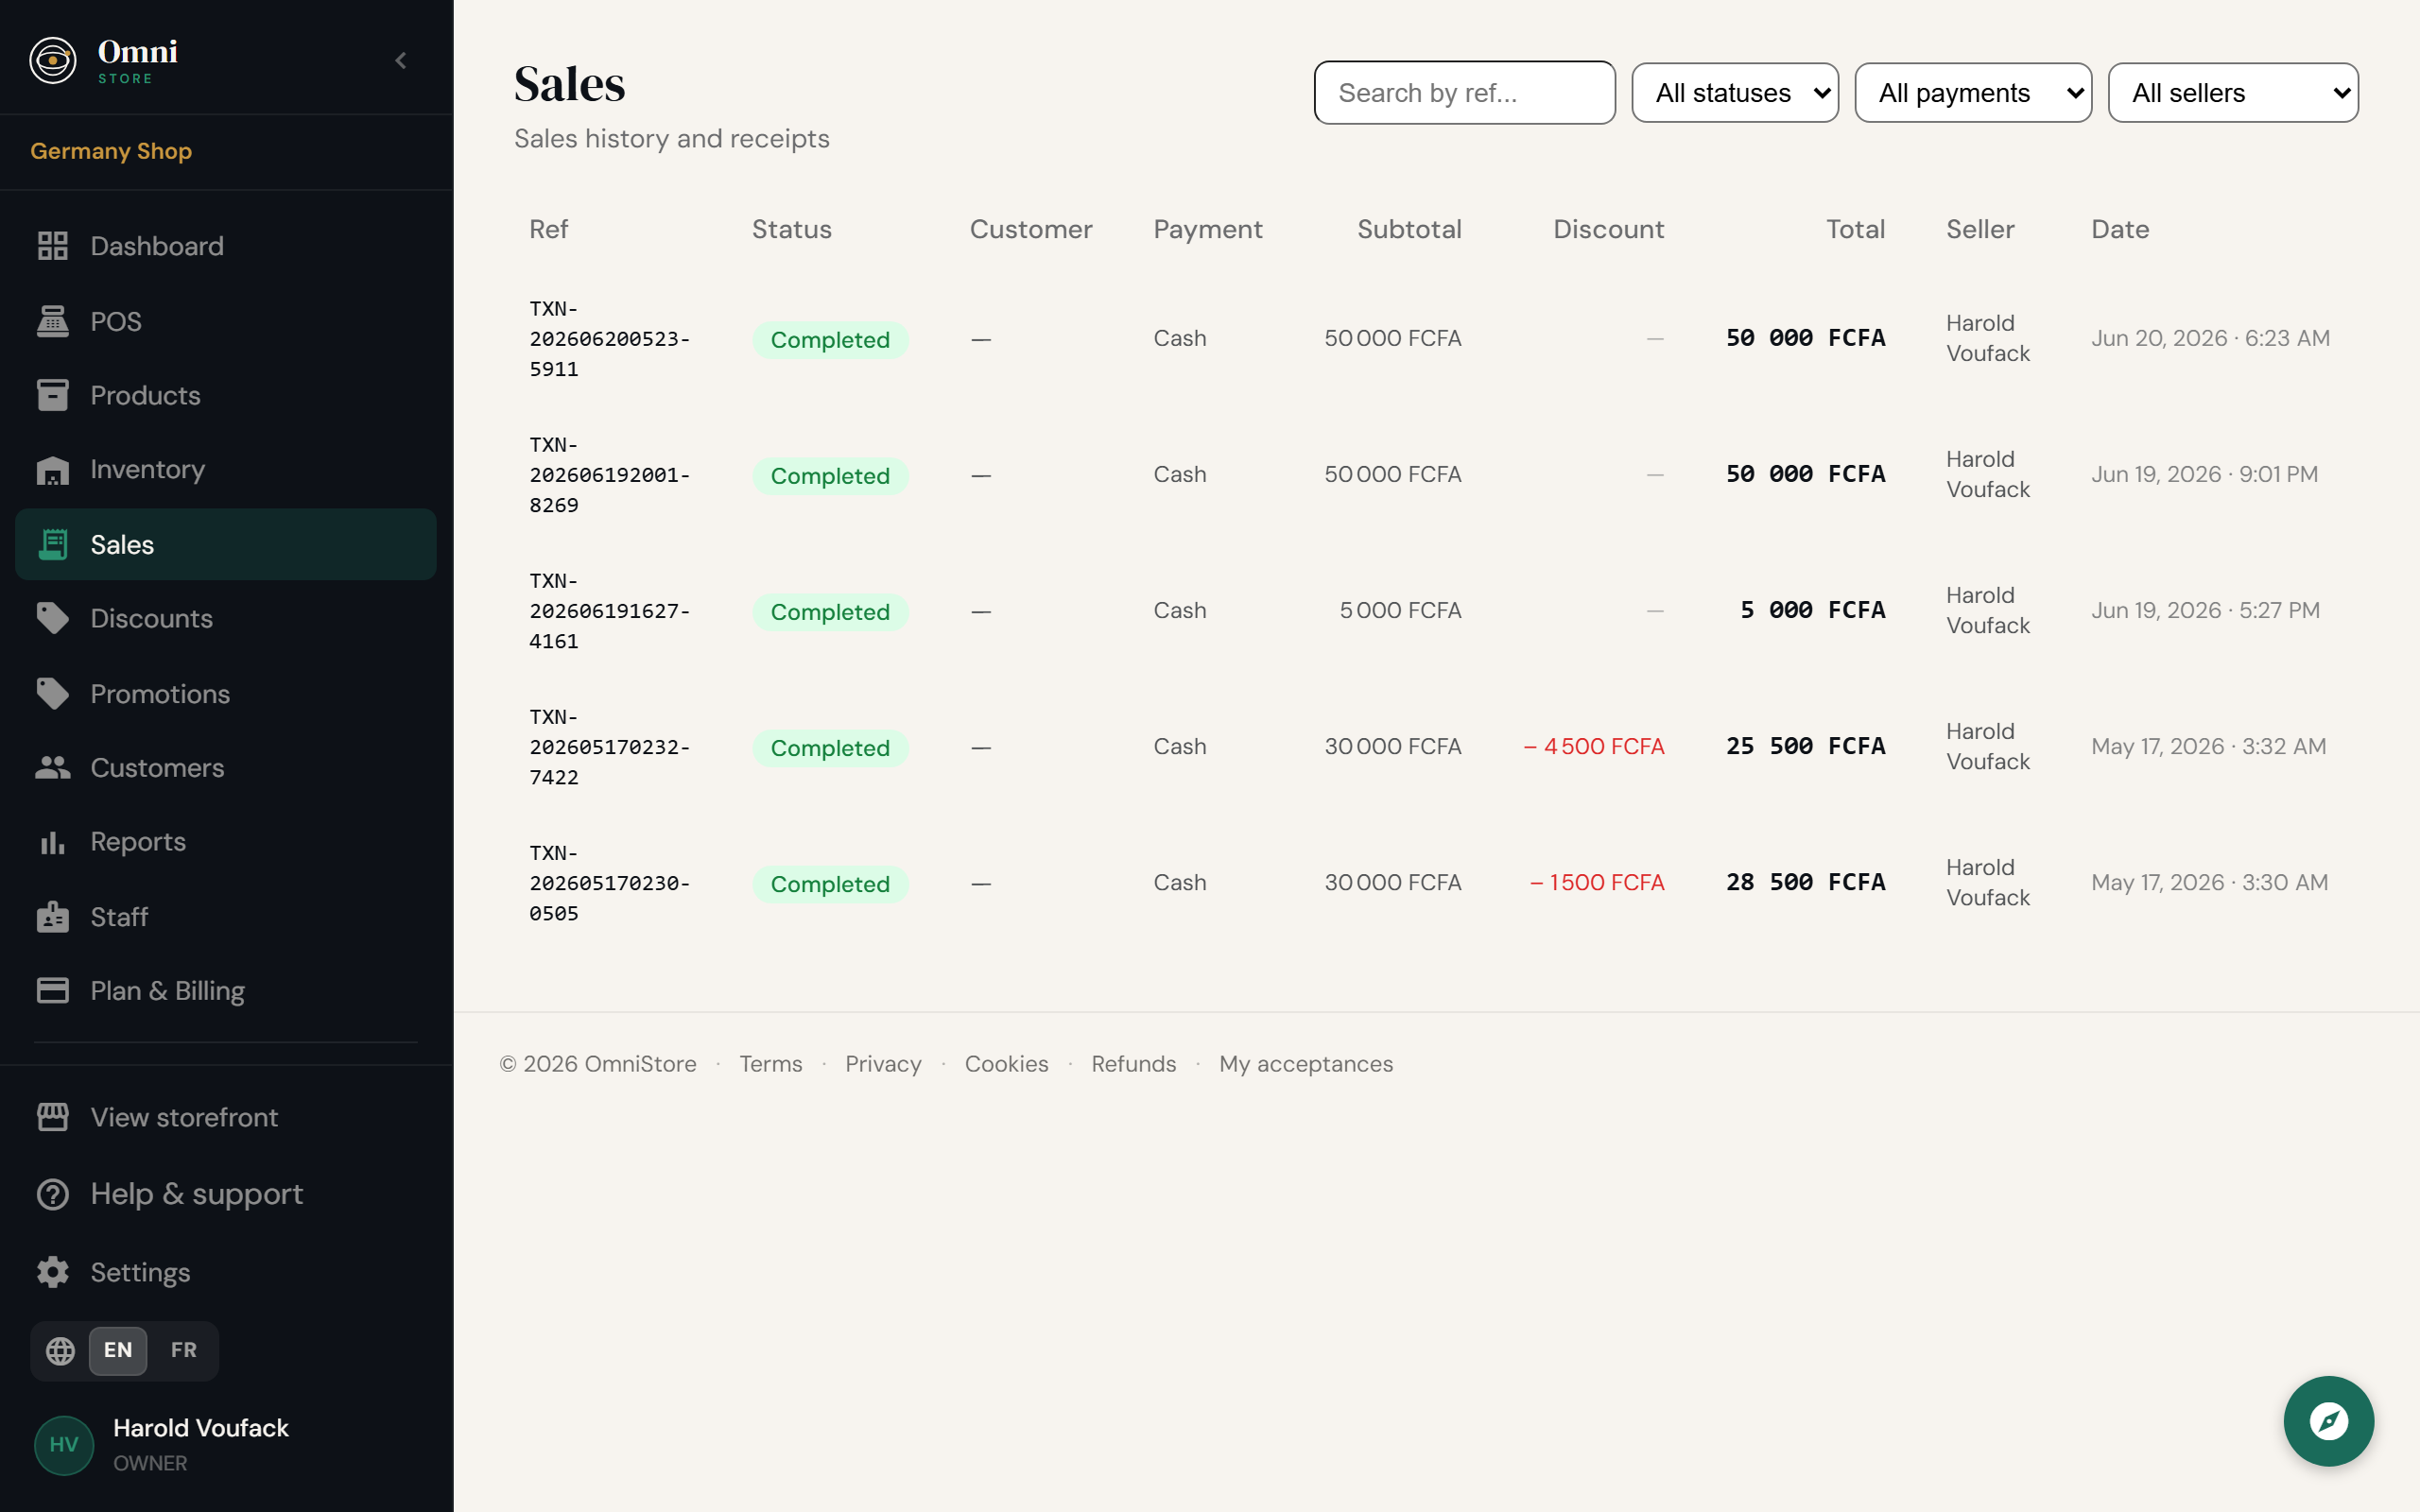
After the sale
Every completed sale appears under Sales, each with:
Mobile view
Each sale shows:
- the items, totals, payment method, and any discount;
- the staff member who made it;
- the customer, if one was attached;
- a receipt you can reprint, email, or resend.
See Receipts for sharing receipts, and Refunds & voids if something needs to be reversed.
Add barcodes to your products (see Products) so you can scan items straight into the sale instead of searching.